By Aparna Nair
It is always a delight when an experiment in the classroom bears fruit in the most unexpected of ways. Last Fall, I had the pleasure of that experience when I taught a course on Non-Western and Indigenous Medicine at the University of Oklahoma’s History of Science department for the very first time. As with most new courses, I began the semester overwhelmed with ideas, readings and anxieties about the topics I was covering in class. To my surprise, I had a truly diverse range of students in the class—the topic appeared to attract a an almost equal number of male and female students, several Native students as well as a significant number of students from the STEM fields, with little prior experience in historical methods.
The challenge here was three-fold: first, to decolonize students’ fundamental understanding of medicine, illness and the body in general. Second, I wanted them to connect to the worlds, theories and practices of non-Western and indigenous medicine beyond the limits of the lecture and readings. Third, I wanted to give them opportunities to develop and practice the research and critical thinking skills we want to inculcate in any student who takes a history of medicine class. I utilized a range of group and individual exercises in order to do this, but undoubtedly the most successful assignment was the pop-up exhibit curated and produced by my students, using 3D and laser printing technologies. I will freely admit that I had been struggling to translate these new technologies into meaningful pedagogical interventions in my course design in previous semesters. This time around, I knew that I did not want the assignment to be solely about having students play around with new technologies and I was determined that I wanted the assignment to achieve the following pedagogical goals:
- To attempt to inhabit the worlds of historical actors (to whatever extent that was possible),
- To understand the purpose of historical scholarship
- To become familiar with the diverse, everyday work of historians.
- To communicate what they learned in the course to others using the pop-up exhibit.
- To become comfortable working in groups.
- To learn how to build a bibliography on an object of their choice.
- To use the Special Collections at the Bizzell Library.
Assignment Description:
These are the directions I gave to my students:
Material objects always bear markers and patinas of culture, context and use. In the case of history of medicine, material culture is especially useful as it allows us a greater understanding of the ways that medicine was and is understood, translated and practiced. This is a multi-stage project, spread out over several days necessitating group work in the classroom, in the Innovation Hub and in the History of Science Collections in the Bizzell Library. Through the several stages, you will learn how to read, analyze and present material culture as instantiations of non-Western medical theories, surgical instruments and techniques. You will work in groups to create miniatures/translations of surgical instruments or anatomical models and theories using 3D and laser printing. The final products of your group work will eventually be put together in a museum-style pop-up exhibition with small placards describing the objects you have chosen. This student-led and student-created exhibition will be displayed in the PHSC building and will be digitized and posted online as well. Envision using the final products of this group project to teach the viewer something useful about non-Western medicine.

This assignment has FIVE components:
- Primary and secondary source research to identify at least a few images of the surgical instruments/anatomical models of your choice.
- Research using the online archives at OU and the History of Science Collections at Bizzell Library on the object/historical context on which you are working.
- Completing your training to use the 3D printer at the OU Innovation Lab.
- Re-creating and translating the images of your choice in the OU Innovation Lab to get them laser cut or 3D printed as miniature models.
- Writing and printing out the plaques that go with the models for the exhibit.
Part I: Building a Research Portfolio on Your Object/Image of Choice
Step I:Each group will identify sources–high definition images–of either anatomical models of the body or parts of the human body or surgical instruments from ancient Egyptian, Chinese or Indian medicine of your choice.
You can choose for instance, the Ayurvedic model of the heart, or forceps from ancient Indian surgical treatises or prosthetic toes from ancient Egypt. You can choose to recreate the flow of QI through various parts of the body according to Chinese Acupuncture models. You can recreate any number of other surgical instruments from the Susruta Samhita.
I suggest your groups use these image archives
- The Wellcome Trust Image Bank
- The World Digital Library
- The Library of Congress
- archive.org
- Science Museum
- The British Library
- The Victoria and Albert Museum
- The National Library of Medicine
- History of Medicine Finding Aids
- The Medical Heritage Library
Make sure to have at least a couple of image choices and options for each model/instrument–this may not always be possible, but at least try! The reason for this is that not all the images will work well–some images will not have the resolution or clarity to be used in the 3D printer successfully. The output is only as good as the input, therefore it is imperative that high quality digital images illustrating as many features as possible without being overly complex are produced and selected for image acquisition and processing. Make sure to understand the source/history/documentation of your images as well. This section will take a lot of time, and it should.

Step II:
Imagine that you have finished the project and envision that you are putting up the final object your group will create in a museum exhibit. The viewers will need to know everything relevant about the object and its historical context. In order to communicate this information, your group will conduct the necessary research that allows you to write a small plaque of at least 400 words for each of the objects you choose. You are required to use primary and secondary sources from OU’s library databases. Describe the historical context of the image and the eventual model (where, when, who, what), what it describes or does, and what other relevant information we have about the object/model.
Final Product to be submitted at the end of Part I: Students will submit a portfolio, comprising the images of the object and a description, along with a bibliography of the sources you used, formatted according to the Chicago Manual of Style.
Part II: Anchoring the Exercise in the Archive (The History of Science Collection at Bizzell Library)
Session Goals for the Library Visit:
- To become familiar with Bizzell Library’s History of Science collection
- To understand the rules of handling the very old books that are safeguarded in the collections.
- To learn how to use the primary and secondary sources available in the collections to identify additional information, images and citations for your 3D/laser printing projects for which you have already prepared. Think of this as an additional step to firming up the portfolio and research foundation for the project.
For your first look, please make sure to take a careful look at all the books on display. If something interests you, I would encourage you to dawdle, take notes and take any photos that you might need.
On your second look, identify the books–whether primary or secondary–that are relevant to your 3D/laser printing projects (trepanation, acupuncture, Ayurveda, etc) and spend enough time with them to be able to use them and cite them in your project. Some of the books will have images that you might be able to use in your project, so make sure to find them. Again, remember to always take notes, and when possible use your phones to take images. Do not forget to keep track of the book/source and its publication details—so always make sure to take a photo of the title and publication pages, and refer back to the book list provided to you before class for additional details.
Part III: Learning to Use the 3D printer/laser printer.
Students will go to the Innovation Hub and become comfortable using the printers. This is not easy, and will require working with the staff at the Lab.
Part IV: Printing the Objects
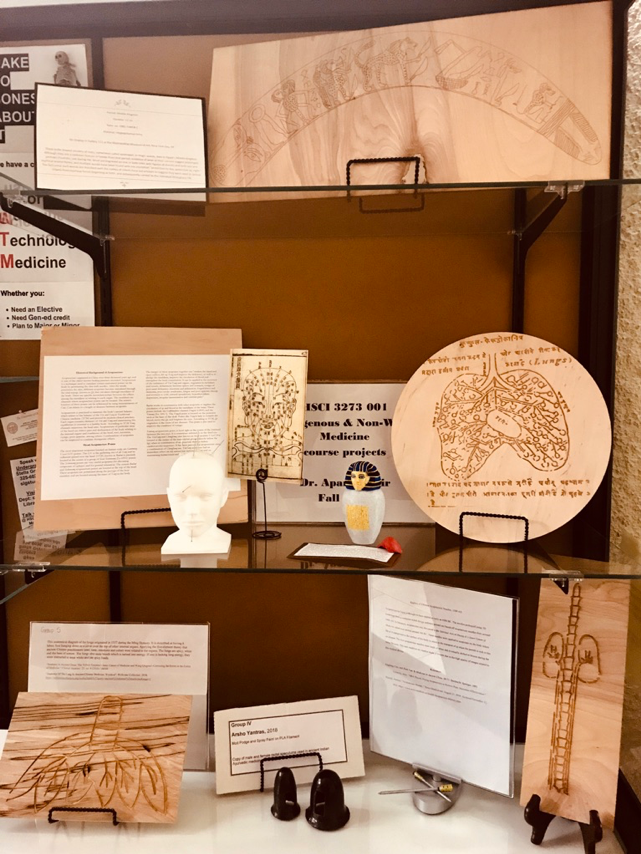
Students printed out their objects over the course of the semester, and groups began presenting their objects to the rest of the class. This was one of my favorite parts of the exercise; the enthusiasm was infectious and most groups were encouraged by the progress of others, and excited to see what would come of their own projects. They included the following objects made with 3D printers:
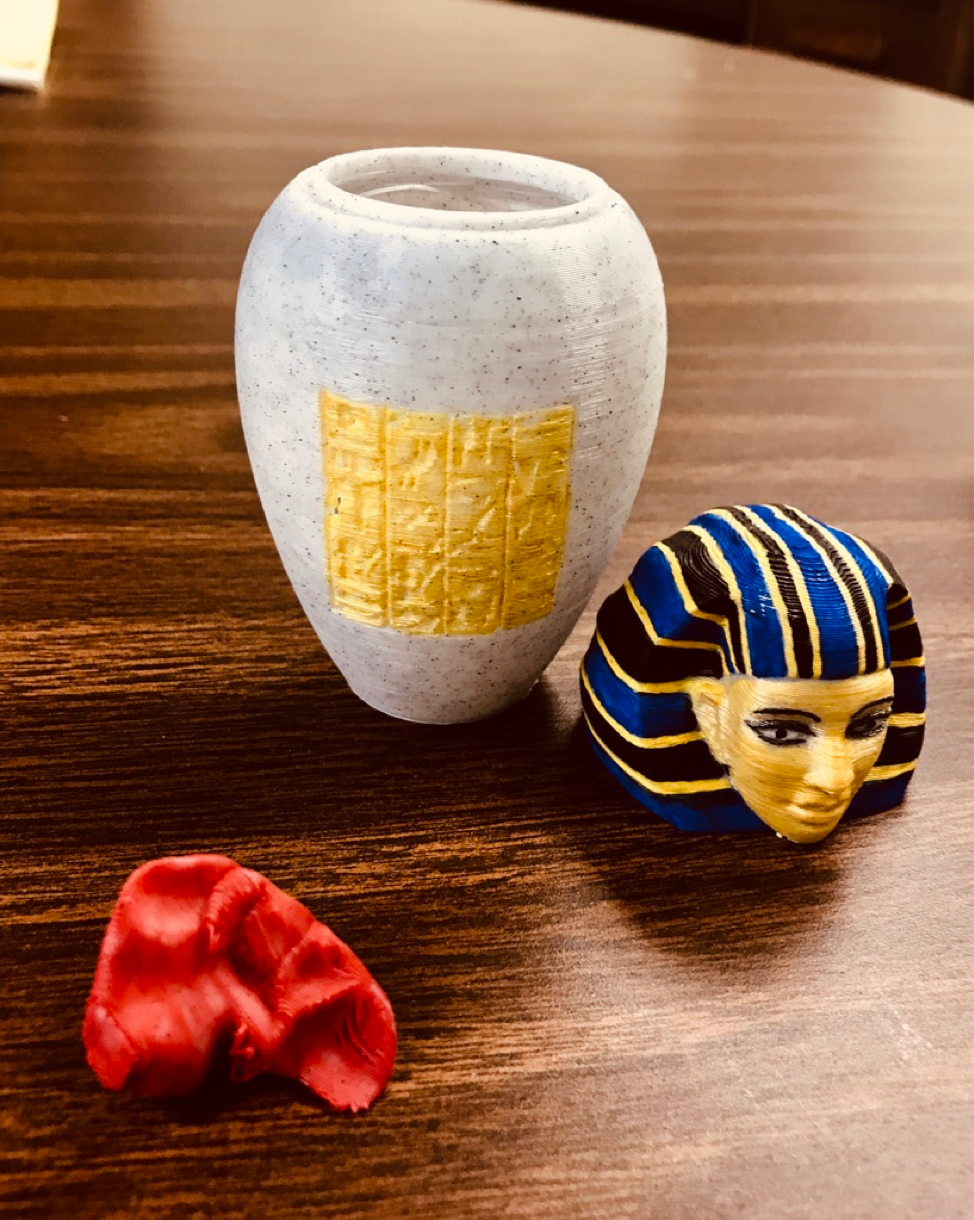
Egyptian canopic jar with liver 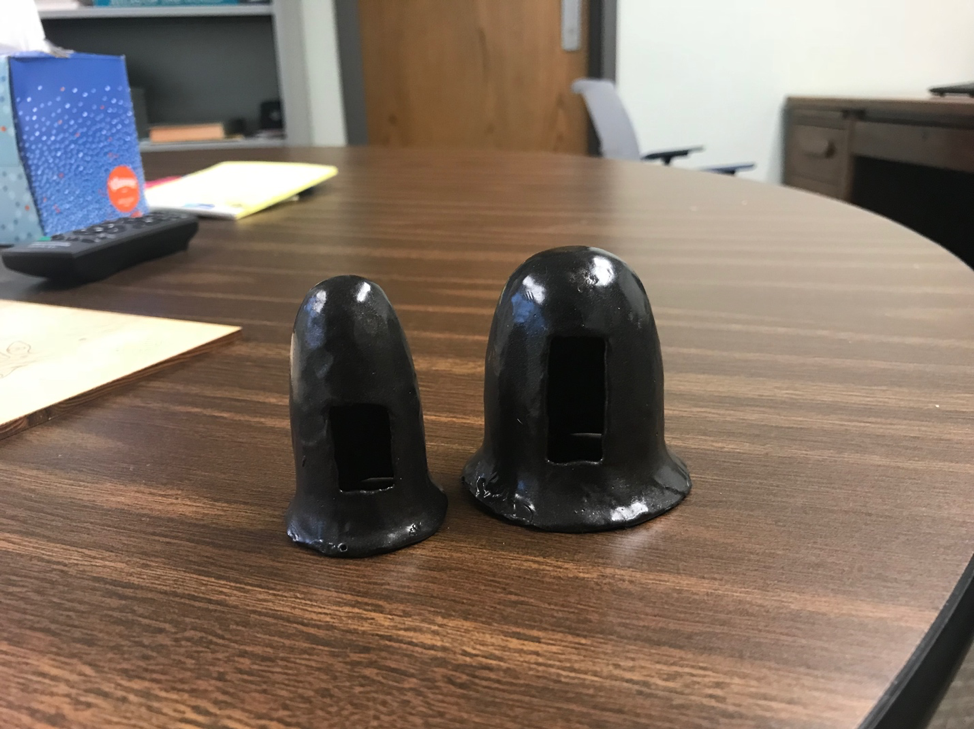
Male and female rectal dilators used in Ayurvedic medicine 
Acupuncture needles, ca. 1300 CE 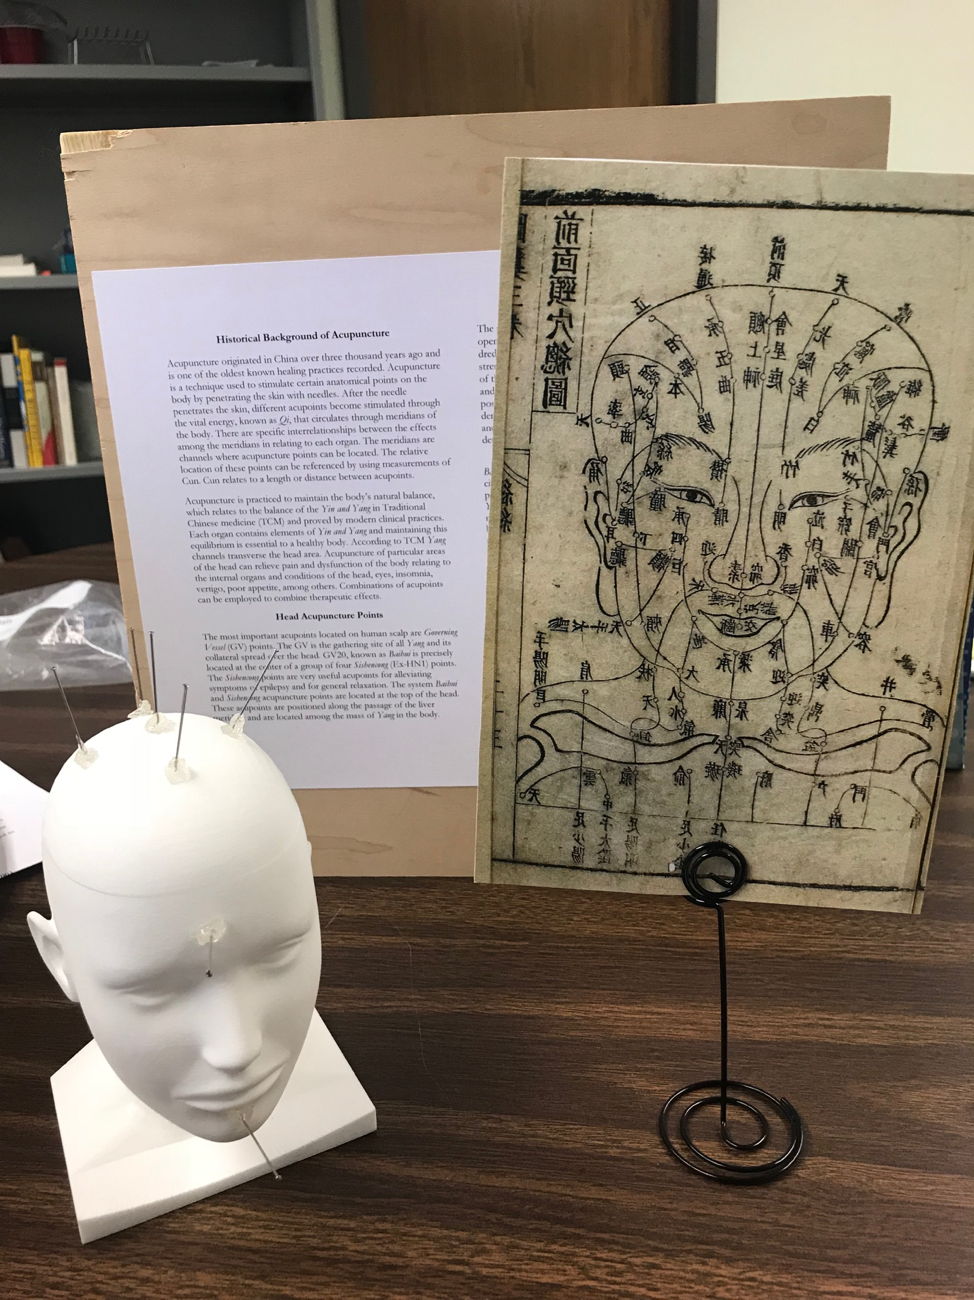
Acupuncture points on the head.
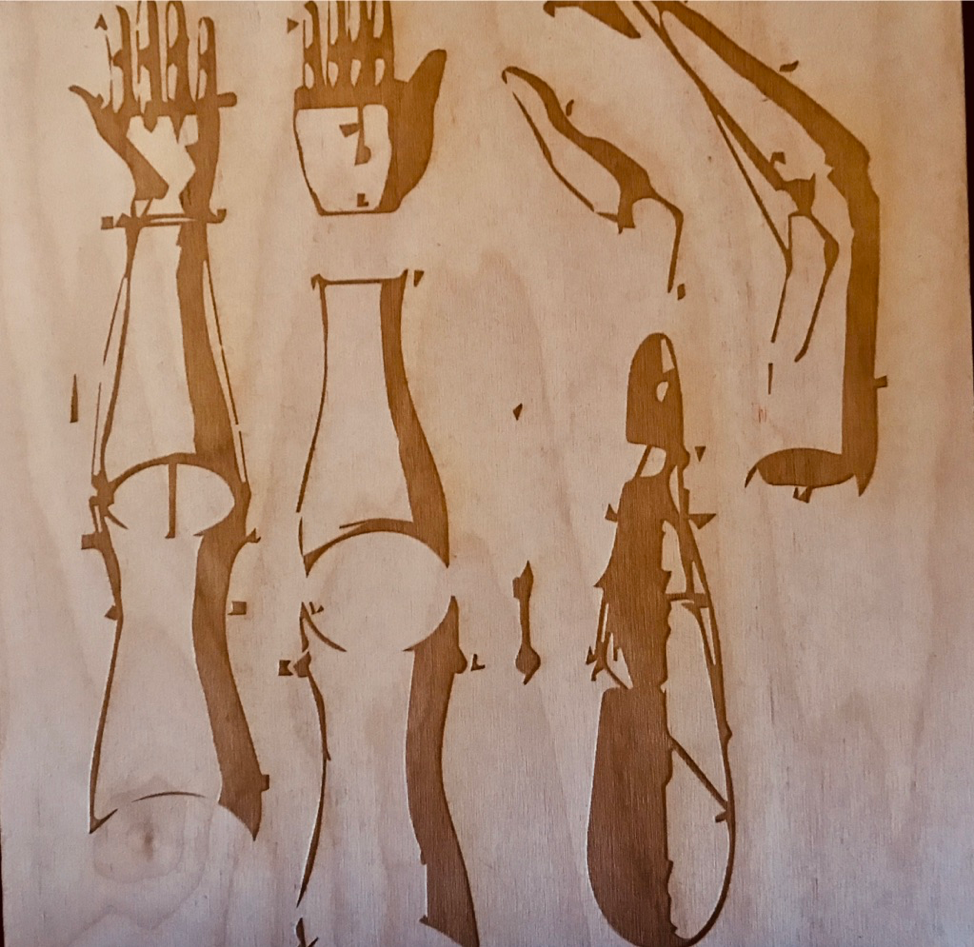
And wooden designs carved with a laser cutter:
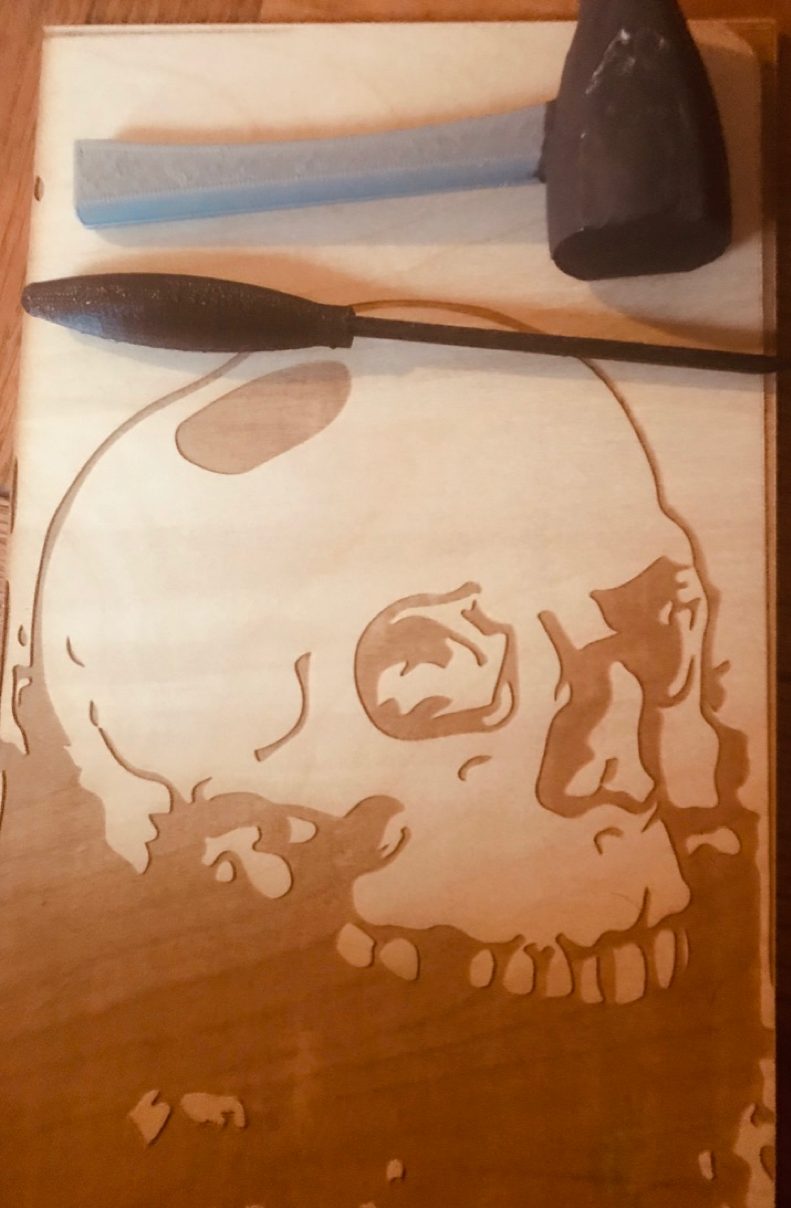
Trepanation in Ancient Medicine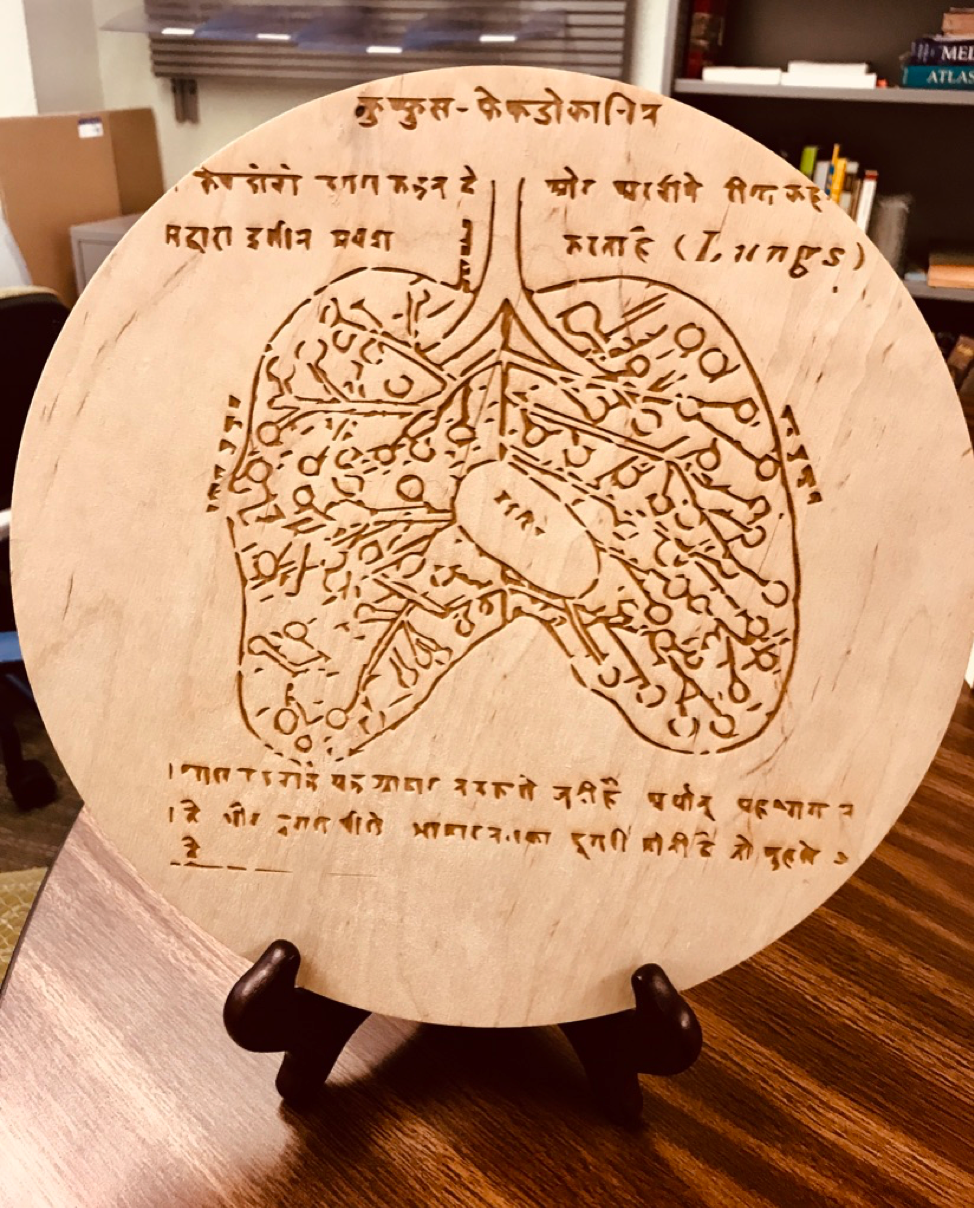

Anatomical diagram of the lungs from Ming Dynasty China (1537 CE)
I also would like to add that without the staff at the Innovation Hub, the assistance of History of Science librarian Dr. JoAnn Palmieri, and my wonderful students’ enthusiasm, this project could easily have failed, but I think the pictures of the exhibit speak for themselves!
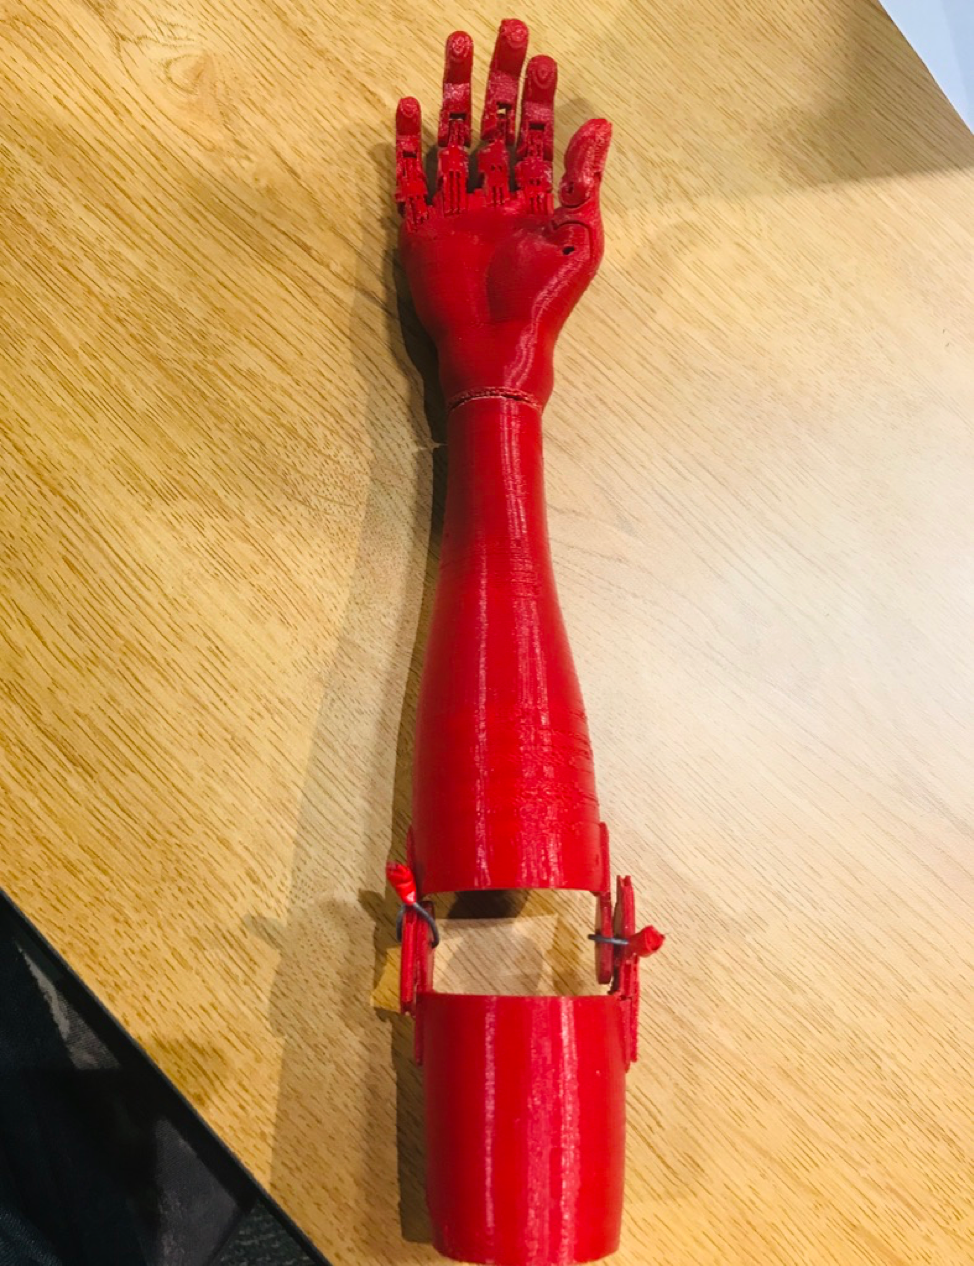
The students’ successes in this class also inspired me to take on a smaller-scale version of the project with my freshman class Health, Medicine and Society. The theme for this exhibit was War, the Body and Technology and students produced a pop-up exhibit on the various ways in which war transformed the human body and the ways in which technology and medicine also responded to the increasing disablement of combatants and civilians. Images from this smaller scale exhibit are included here:
Additional resources
Huang Ti Nei Ching Su Wên, The Yellow Emperor’s Classic of Internal Medicine
Guifang Dou, Shinkan Kōtei meidō kyūkyō (1659)
